Get Digitally Organized: Organizing Your Photos
In this second post in our Getting Digitally Organized series I take a look at 4 great software applications that help you import your photos from your digital camera and the various ways they can manage them on your PC.
In this second part of our “Getting Digitally Organized” series I thought we’d take a look at how you can organize and manager your digital photos.
With the advent of digital cameras – both DSLR and on your smart phone – it’s become a lot easier to snap multiple images. Gone are the days of really having to think about what you wanted to photograph as you only had 24 shots on your roll of film available!
Index
As this is a rather long post you can jump to a section here:
- The Problem With Digital Photos
- How To Organise Your Digital Photos
- Adobe Bridge CC
- Magix Photo Manager 16
- FastStone Image Viewer
- Windows 10 Photo App
- And The Winner Is…
The Problem With Digital Photos
I’ve recently started to take photos of some of the meals I cook for an upcoming food blog I am starting. This means that for one recipe I’ll have a minimum of 3-5 food prep shots and anywhere from 1 to 10+ shots of a finished dish. I need to be able to find photos to illustrate my recipes quickly, or find photos that match certain keywords which is a bit difficult when the default image name is something like IMG_001_195.jpg as I’m sure you’ll agree!
Generally though, we’re no longer just taking a single photo of a shot. We have the luxury of enough memory to take multiple shots, or use burst mode to make sure you capture the perfect image. This means that we have a lot of photos to store and sort so organising them is a big priority.
There are some tools that will automate most of the process for you, I could upload my photos to Google Photos which does a great job of automatically sorting your photos into categories such as Food, Beach etc. but if you use their free service you’ll have to upload your photos at a lower resolution which isn’t an ideal solution for DSLR images. The service works really well on a Smart Phone, however if you’re using a stand-alone camera you’d need to copy your photos to your computer and then upload them to Google Photos which could take a really long time.
How To Organise Your Digital Photos
What I was looking for was a simple solution that didn’t require too many steps to complete and that allowed me to copy files to a 1TB external hard drive so that I could access my photos on my Windows Laptop, Desktop PC and (as a bonus) my MacBook (and maybe even Chromebook).
I concentrated on looking at Windows-based PC solutions for this article as this is the platform I’m using the most at the moment, plus most (if not all) Macs come with iPhoto pre-installed which is a fantastic program. Unfortunately I can’t rely on iPhoto on my MacBook any more – it’s now 10 years old, has reached the end of it’s update lifecycle and is on it’s last legs bless it. Instead I thought I’d concentrate on software that would work on my new Windows laptop and my (slightly aging) Desktop PC.
So after a fair bit of research I have narrowed my top picks down to the following 4 programs which will help you manage and organise your photos with ease.
Adobe Bridge CC
![]()
I was surprised to find that you can download Adobe’s image organising software for free. You need to install their Creative Cloud app first and from their you can install Bridge. This makes the install process a bit of a long winded process: it took about 20 minutes for the Creative Cloud app and the a further 10 minute for Bridge CC so I’d grab yourself a cup of coffee before starting!
Before being able to download and install the programs you’ll also need to sign in with (or create) and Adobe Creative Cloud I.D, but that’s a small price to pay for free software I guess!
Import Settings

When you insert your SD card (or attach your camera) the inbuilt windows dialog box pops up asking you what you want to use to process the images, you can choose Bridge as the option and, as you can see from the graphic below you can run the free version of Bridge CC alongside other versions (CS6 in my case). This is great is you have a PC running and older version of Adobe Creative Suite and one that hasn’t got anything on it, you can keep your photo management consistent by using the same version of the program across multiple devices.
Importing Photos

Importing photos is simple, you simply select the location you want to save the files to and then chose the file name format you want to use. It’s important to note here that you can only use one from the limited pre-set list provided and there doesn’t seem to be a way for you to specify your own format either which is a shame.
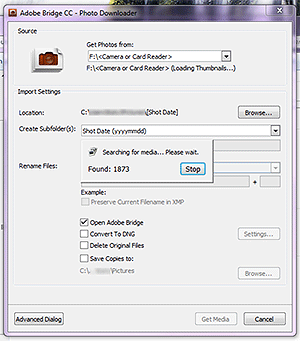
The import of 1800 photos took around 20 minutes over a standard USB2 connection.

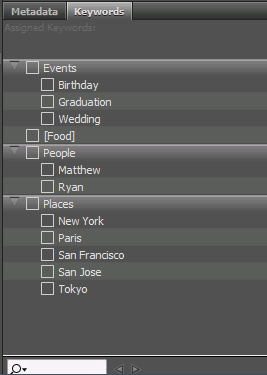
Other Features
There aren’t albums as such in Bridge but you can organise your photos into “Stacks” this allows you to group shots by type, subject, day etc. From what I have seen, a file can’t belong to 2 stacks so it is a bit limited in its use. Bridge does however allow you to tag your photos with multiple keywords which will help you further organise and search for photos. You will need a separate program to make even the most minor of edits though as no image editing functionality is included.

Thoughts
PROS: Free, works on PC and Mac, great tagging system
CONS: No inbuilt image editing, no albums
RATING: 4 out of 5
Magix Photo Manager 16
![]()
Magix Photo Manager 16 (MPM16) is available as a featured-limited free download or as a delux version costing £34.99 (price correct at the time of writing). The free version is available for 7 days and after that you need to enter your email address to keep using it, the deluxe version has a 30-day free trial.
On running the program for the first time, you’re presented with a very dark interface! There is a light theme which looks a lot better in my opinion but I can see what they’re doing with the dark theme being the default as it’s the standard colour scheme in industry standard programs like Adobe Lightroom and Bridge.
Important Note: Make sure you select custom installation and check the boxes to show that you do not want to install third party software.
Import Settings
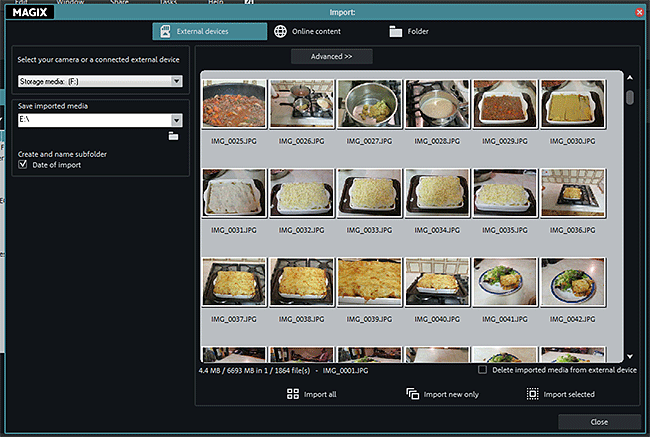
Importing files is easy, select the location you want the files to import to, just make sure you uncheck the “Back up a copy of photos to C Drive” option or you’ll end up with a second copy of your files which I didn’t really want.
The import creates a folder structure of: Date of import > Image_Name
It would be nice if you could specify the folder structure a bit more as you can with other applications.
Importing Files
An import of 1800 photos took just over 20 minutes on a standard USB2 drive.
Other Features
One great feature of MPM16 is the ability to create albums. You can add a photo to a album (or albums) by just dragging it from the file pane into the album you want to assign it to. This is a great way of organising photos by type, event or even things like colour.
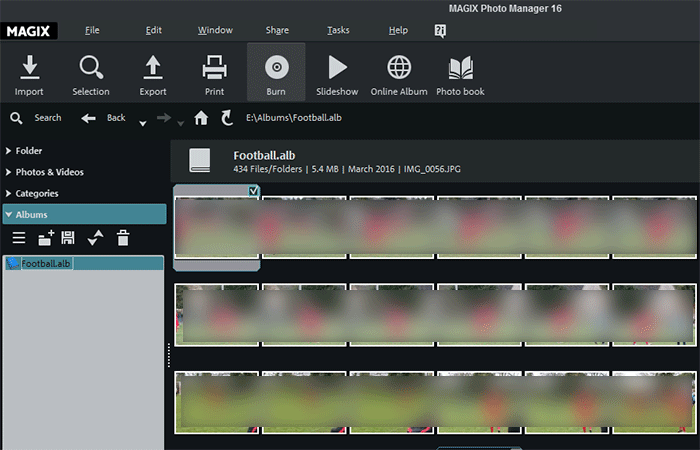
Both the free and delux versions allow to you create and assign categories to photos. It has some pre-made ones for you but it’s a relatively simple step to add your own.
The delux version also comes with facial recognition, allowing you to tag people in photos which it learns from and will then apply the tags to photos for you.
There are basic editing tools included like brighten, contrast, redeye removal, crop and straighten so you’ll need an external program if you’re looking for filters or more robust editing tools.
Thoughts
PROS: Great basic features and editing tools
CONS: Facial tagging is only available in the delux version.
RATING: 5/5
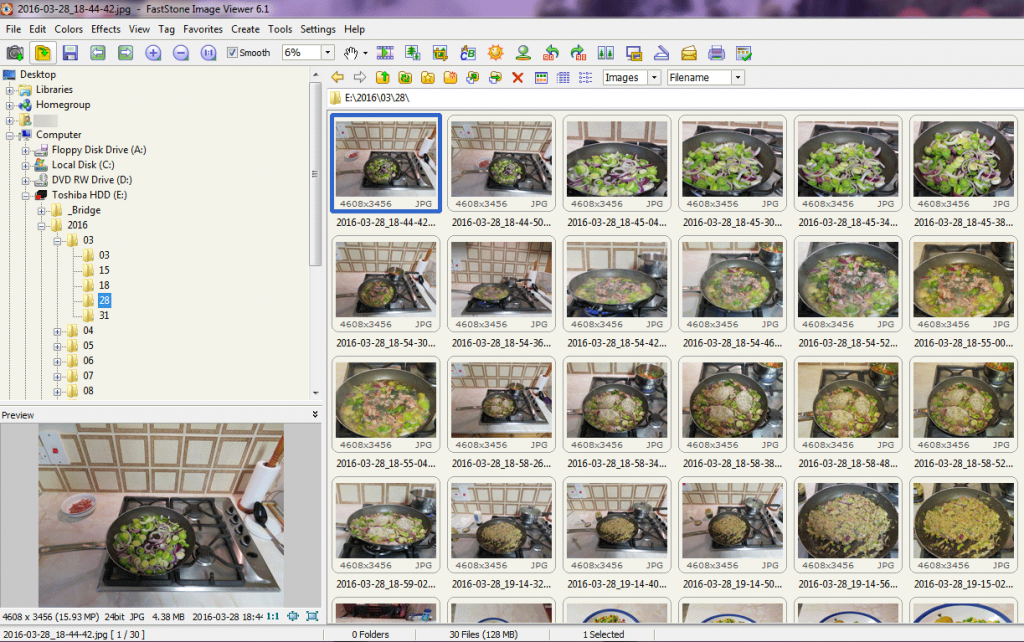
FastStone Image Viewer 6.1
![]()
Don’t be put off by FastStone’s dated interface, it hides some really powerful features.
Import Settings
The program’s default import format is Year > Month > Day > Filename

There is however functionality to use regular expressions (RegExp) to rename files in a variety of different formats making it the most versatile import tooks on this list.
When importing you can use one of the inbuilt RegExp provided or come up with your own.
Importing Photos
Importing 1800 photos on a standard USB2 connection took a little over 20 minutes, which includes the renaming of files.
Other Features
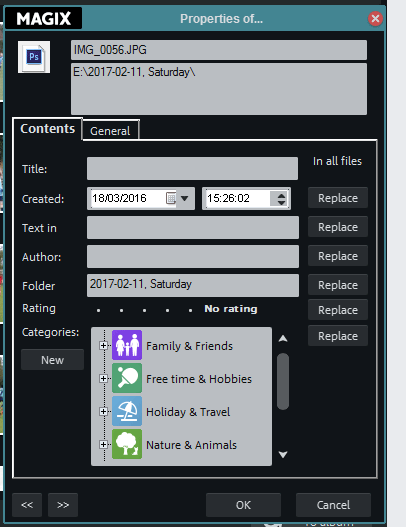
FastStone doesn’t include any tagging functionality but you can access the in-built Windows tagging through the file properties menu. FastStone does allow you to flag images (which it confusingly calls tag) so that you can filter on this criteria later, there’s no album functionality either which is a shame.
FastStone also has some basic image editing functionality such as red eye removal, straighten, crop, brightness, contrast, clone and healing brushes, sharpen, blur, annotation and level/curve adjustment.
There aren’t any filters but it’s a very comprehensive set of image editing tools and for most users should mean that another image editing tool isn’t needed.
Thoughts
This may come across as being a basic program but under the hood there’s a great deal of functionality. The program is under active development so hopefully inbuilt tags and albums are something they’ll look into adding soon.
PROS: Great editing capabilities, superior file renaming
CONS: Limited file and photo organisation without proper image tagging for files, No search functionality
RATING: 4/5
Windows Photo For Windows 10
![]()
Inbuilt into Windows 10 (but also available from the Windows App store) Windows Photo is Microsoft’s latest photo management offering. I’ve included this item in my review as most modern PCs should be able to run this software, however I couldn’t get any Microsoft photo products to download and install on my Windows 7 PC so while technically this product fails my main requirement, it’s my equipment’s fault rather than an issue with the software itself.
Import Settings
Unlike previous Windows photo management tools which always seemed to force you to use the “My Photos” folder to organise your snaps, Windows Photo allows you to choose where you want to save your photos.

There’s a simple import interface and files are imported in Month > Day > Filename format.
Importing Photos
I was able to use USB3 on my Windows 10 laptop which imported 1800 files in under 10 minutes, so it would take around 20 minutes over USB2.
Other Features
Windows photo contains some basic filters so you can give your photos that “Instagram” look on your desktop, you can also crop, rotate, enhance and draw on your photos. Another nice touch is the ability to share the photo directly with any other app installed on your machine.

There isn’t any inbuilt tagging and the really annoying thing is that the right-click context menu doesn’t allow you to access the window File properties, only the photo properties which can’t be editied so if you want to add a tag to a photo you’ll need to open the containing folder, right click on the image in the explorer window and edit the properties from there.
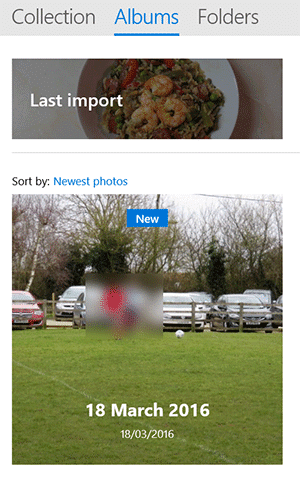
The app does contain albums though and will group together photos it thinks belong together when you’re importing them. Photos can belong to more that one album which should help greatly with organisation.
Thoughts
PROS: Free with most Windows PCs, albums (and smart album creation) is a nice touch, as are the filters
CONS: No inbuilt ability to add tags is a big missed opportunity, no inbuilt search.
RATING: 3/5
AND THE WINNER IS…
This is a tough one to decide!
Based on my original criteria then the winner would be Adobe Bridge CC purely for the fact it will run on both my Windows PC, Laptop and Macbook, however the lack of Albums is a bit of a deal breaker for me, I find that I use them quite a lot in iPhoto to organise my photos so this is an important part of my workflow.
Windows 10 Photo App has some decent features and while it allows you to create albums the lack of tag support and the fact that there’s no inbuit search to find tags is a big no-no.
FastStone comes in a higly placed second, while I can organise the photos into folder, I’d have to duplicate photos to get them in to multiple “albums” and again there’s no way to search tagged files.
![]()
The winner then is Magix Photo Manager 16 because most of my photographs are of food, the free version is more that adequate for my needs I would recommend the delux version though if you take a lot of photos of people.
What Do You Think?
According to a survey I posted in my newsletter recently most people use iPhoto to manage their photos so for those of you on Windows-based machines what’s your photo app of choice?
Let us know what you use in the comments below, I’d love to check out some more programs!

- Follow Katy Whitton on: